第10回では前回検証したINA219を、旅Arduinoに組み込みます。
第9回はこちらからどうぞ
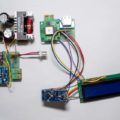
旅を楽しくするArduino端末Ver2の構成
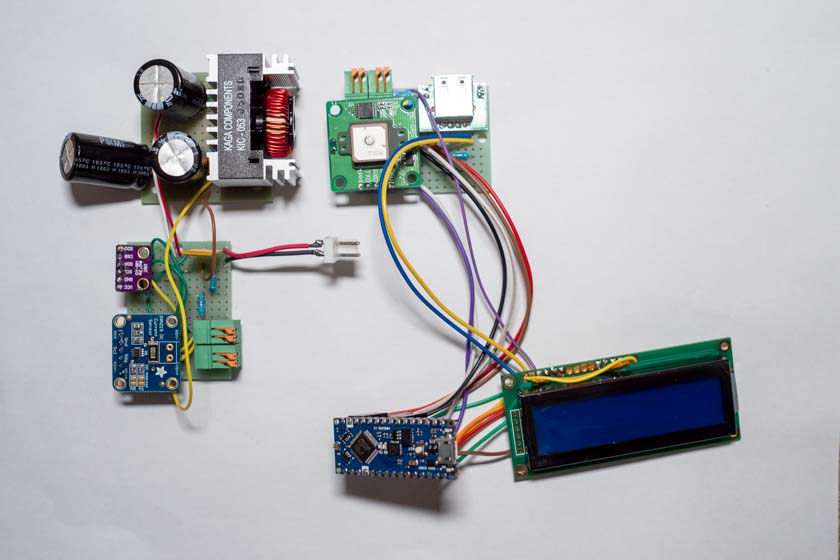
今回作成する端末は以下の構成とします。
・arduino nano every(制御用マイコン)
・LCD1602(センサー値表示用LCD)
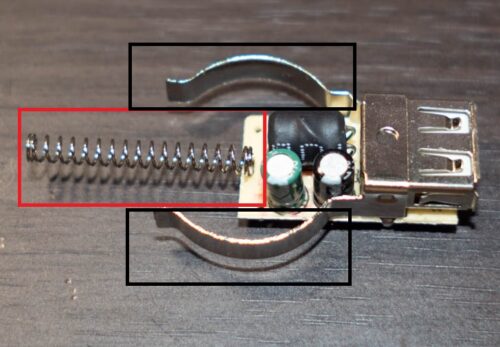
・USB2.0端子(スマートフォン充電用) + 抵抗(2A給電仕様にする為)
・BME280(温度・湿度・気圧測定用)
・GPSモジュール:GYSFDMAXB(進路方角取得用)
・DC-DCコンバータ5V,3A:KIC-053&ポリスイッチ
・Adafruit INA219 Current Sensor
・ユニバーサル基盤D基板1枚+C基板1枚(電源部と制御部用)
以上の構成で作成を行います。
前回の改善点を踏まえ電源を5V一本にしています。
また、LCD側(ハンドル装着部)をコンパクトにするため、I2Cで通信できるものは、電源部(シート下)に移動させます。
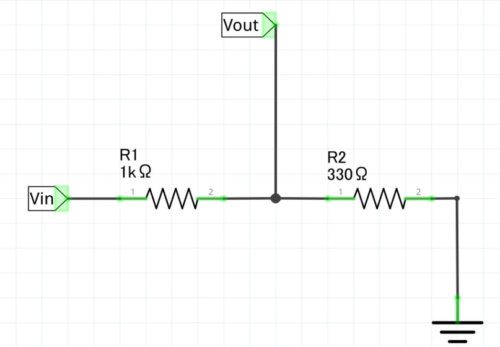
製作する前に回路図を書き、おおよその部品配置を検討します。
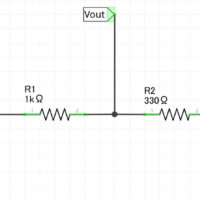
回路

前回の設計図を一部使い、設計図を引き直します。
DC-DCコンバータを変更しているので、その周辺が一番修正がかかっています。
また、実物に関しては、電源部と制御部を分けた作りにしています。
バッテリーから近いシート下に、電源部をまとめ、そこから屋外配線用の4線ケーブルを用い、ハンドル部まで電源&信号を配線しています。
ちなみに4線の内訳は
① +9V
② GND
③ SCL
④ SDA
となっております。
外装設計

ここは変更がありません。
LCD部はコンパクトになるので、時間があれば作り直したいところです。
コード
#include <LiquidCrystal.h>
#include <TinyGPS++.h>
#include <SoftwareSerial.h>
#include <Adafruit_INA219.h>
#include "SparkFunBME280.h"
#include "Wire.h"
#include "SPI.h"

static const int TXPin = 2, RXPin = 3;
static float m_fltCurrentTemperature;
static float m_fltCurrenthumidity;
static float m_fltCurrentPressure;
static float m_fltCurrentVoltage;
static float m_fltCurrentCourse;
static float m_fltCurrentAltitude;

Adafruit_INA219 ina219;

TinyGPSPlus gps;
SoftwareSerial ss(TXPin, RXPin);

BME280 Sensor;
LiquidCrystal lcd( 4, 5, 6, 7, 8, 9 );

void DisplayTmp( float temperature, float humidity, float Pressure, float Voltage, String strDirection, float Altitude )
{
  String strTemperature =  String( temperature );
  int inthumidity =  humidity;
  String strhumidity = String( inthumidity );
  int intPressure = Pressure;
  String strPressure =  String( intPressure );
  String strVoltage =  String( Voltage );
  int intAltitude = Altitude;
  String strAltitude =  String( intAltitude );

  String strDisplay = "T";

  strDisplay.concat( strTemperature );
  strDisplay.concat( " H" );
  strDisplay.concat( strhumidity );
  strDisplay.concat( " P" );
  strDisplay.concat( strPressure );
  lcd.setCursor(0, 0);
  lcd.print( strDisplay );

  strDisplay = "V";
  strDisplay.concat( strVoltage );
  strDisplay.concat( " A" );
  strDisplay.concat( strAltitude );
  strDisplay.concat( " " );
  strDisplay.concat( strDirection );
  lcd.setCursor(0, 1);
  lcd.print( strDisplay );
}

String ConvertDegrees( float intCourseDegrees ){
  String strDirection;
  if ((intCourseDegrees) <= 0) {
     strDirection = "XXX";
    }
    else if ((intCourseDegrees) > 360) {
     strDirection = "XXX";
    }
    else if ((intCourseDegrees) < 11.3) {
     strDirection = "N";
     }
    else if ((intCourseDegrees) < 33.8) {
     strDirection = "NNE";
     }
   else if ((intCourseDegrees) < 56.3) {
     strDirection = "NE";
     }
   else if ((intCourseDegrees) < 78.8) {
     strDirection = "ENE";
     }
   else if ((intCourseDegrees) < 101.3) {
     strDirection = "E";
     }
  else if ((intCourseDegrees) < 123.8) {
     strDirection = "ESE";
     }
 else if ((intCourseDegrees) < 146.3) {
     strDirection = "SE";
     }
 else if ((intCourseDegrees) < 168.8) {
     strDirection = "SSE";
     }
 else if ((intCourseDegrees) < 191.3) {
     strDirection = "S";
     }
 else if ((intCourseDegrees) < 213.8) {
     strDirection = "SSW";
     }
else if ((intCourseDegrees) < 236.3) {
     strDirection = "SW";
     }
else if ((intCourseDegrees) < 258.8) {
     strDirection = "WSW";
     }
else if ((intCourseDegrees) < 281.3) {
     strDirection = "W";
      }
else if ((intCourseDegrees) < 303.8) {
     strDirection = "WNW";
     }
else if ((intCourseDegrees) < 326.3) {
     strDirection = "NW";
     }
else if ((intCourseDegrees) < 348.8) {
     strDirection = "NNW";
     }
else {
     strDirection = "N";
     }
     return strDirection;
  }

void setup() {
  Serial.begin(115200);
  while (!Serial) {
      // will pause Zero, Leonardo, etc until serial console opens
      delay(1);
  }

  uint32_t currentFrequency;

  if (! ina219.begin()) {
    Serial.println("Failed to find INA219 chip");
  while (1) { delay(10); }
  }

  Serial.println("Measuring voltage and current with INA219 ...");

  lcd.begin( 16, 2);
  lcd.clear();
  lcd.setCursor(0, 0);
  lcd.print("MC Touring ADV!");
  Serial.println("LCD SetUp Ready");

  Sensor.settings.commInterface = I2C_MODE;
  Sensor.settings.I2CAddress = 0x76;
  Sensor.settings.runMode = 3;
  Sensor.settings.tStandby = 0;
  Sensor.settings.filter = 0;
  Sensor.settings.tempOverSample = 1 ;
  Sensor.settings.pressOverSample = 1;
  Sensor.settings.humidOverSample = 1;

  Serial.println("Starting BME280... ");
  delay(10);
  Sensor.begin();

  ss.begin(9600);
  ss.println("Connect Success");
}

void loop() {
  float temperature;
  int temperatureB;
  float humidity;
  int humidityB;
  float Pressure;
  int PressureB;
  float ShuntVoltage;
  float BusVoltage;
  float Voltage;
  int VoltageB;
  //float Power;
  float Course;
  float Altitude;
  String strDirection;

  for (int i=0; i <= 1000; i++){
    while (ss.available() > 0){
      if (gps.encode(ss.read())){
        if (gps.location.isUpdated()){
          Serial.println(gps.course.deg());
          Serial.println(gps.altitude.meters());
          if ( gps.course.deg() != 0 ){
            m_fltCurrentCourse = gps.course.deg();
          }
          if ( gps.altitude.meters() != 0 ){
            m_fltCurrentAltitude = gps.altitude.meters();
          }
        }
      }
    }
  }

  strDirection = ConvertDegrees( m_fltCurrentCourse );

  temperature = Sensor.readTempC() * 10;
  temperatureB = temperature;
  temperature = temperatureB;
  temperature = temperature / 10;
  humidity = Sensor.readFloatHumidity();
  humidityB = humidity;
  humidity = humidityB;
  Pressure = Sensor.readFloatPressure() / 100;
  PressureB = Pressure;
  Pressure = PressureB;

  ShuntVoltage = ina219.getShuntVoltage_mV();
  BusVoltage = ina219.getBusVoltage_V();
  Voltage = (BusVoltage + (ShuntVoltage / 1000))* 10;
  VoltageB = Voltage;
  Voltage = VoltageB;
  Voltage = Voltage / 10;
  //  power_mW = ina219.getPower_mW();

  if( m_fltCurrentTemperature != temperature or m_fltCurrenthumidity != humidity or m_fltCurrentPressure != Pressure or m_fltCurrentVoltage != Voltage )
  {
    lcd.clear();
    //Serial.println(analogRead(A0));
    DisplayTmp( temperature, humidity, Pressure, Voltage, strDirection, m_fltCurrentAltitude );
    m_fltCurrentTemperature = temperature;
    m_fltCurrenthumidity = humidity;
    m_fltCurrentPressure = Pressure;
    m_fltCurrentVoltage = Voltage;
  }
    delay(1000);
}
前回のコードをもとにして、コードを書き換えます。
※時間があったらリファクタリングします。今はとりあえず動くのでこれで
何も対策をせずにループを設計するとループが1秒おきに置き、LCDをクリアにするため画面ちらつき、非常にみずらくなっています。
なので、ちらつき対策として、センサー値の変動がない場合はLCDをクリアにしないようにしているのですが、BME280の温度センサーが小数点第2位まで測定しているため、小刻みに温度が動き、結果LCDの書き換えが起き、ちらつきが発生するといった問題がありました。
なので、いったん取得した温度の小数点第2位を切り落とす処理を加えています。これで画面のちらつきを抑えています。
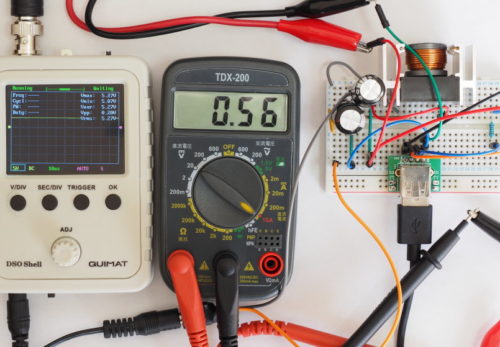
またINA219を入れてますので、電圧はアナログではなくI2Cから取得できるようになりました。
結果
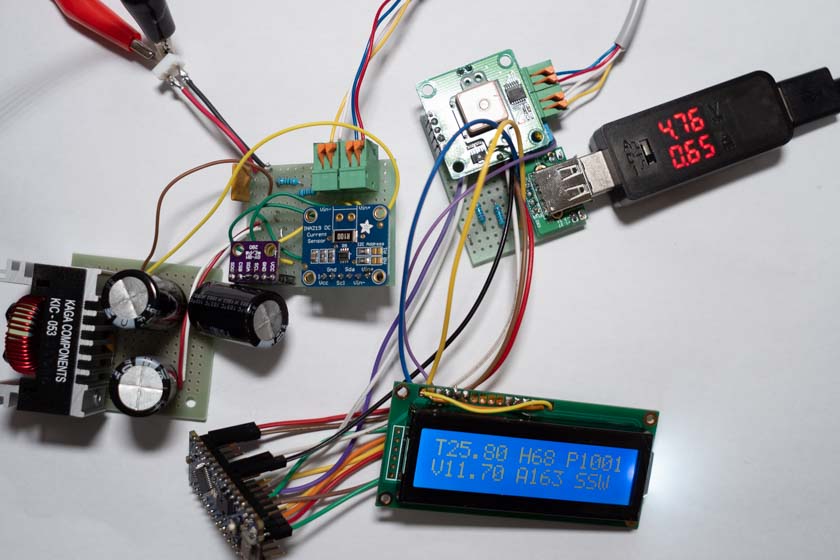
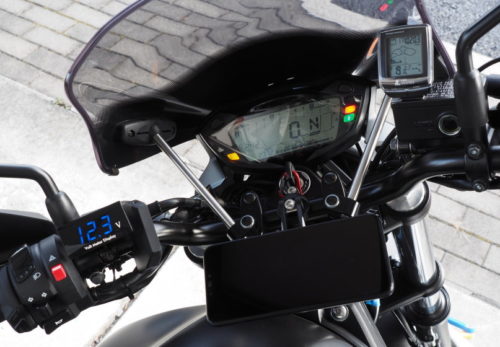
写真がごちゃごちゃしてて申し訳ないのですが、動作写真になります。
外気温等を測定できるBME280、電流・電圧が測定できるINA219、高度と進行方向を算出するGPSが動作し、USB充電にも対応している形式にになり、これらの動作電源は、12Vのバイクのバッテリーから引けるようになってます。
回路も以前よりすっきりしていますので、なかなか良いのではないでしょうか!
まとめ
Ver1で起きていた不具合や、改良点をVer2では組み込めたと思います。
ここからの改良案ですが、
1.GPSモジュールを活用し逆Tripメーター(トリップマスター)の作成
2.LCDの有機EL化(広視野角)
3.消費電力やGPSのほかの情報を表示する第2画面の作成(切り替えスイッチ)
を予定しています。
1に関してはまだ試作も終わっていないので、時間がかかると思います。
(情報を集めている段階では何とかなりそうな感じはします)
2に関しては購入さえしてしまえば切り替えできるので、何かのついでに購入します。
3に関しては設置場所が問題ですかね。ハンドル周りにつけるのが、ベストですが操作できるようにケースを作る必要がありますね。
この旅Arduino記事ですが、そこそこいろいろな方に見ていただけるみたいなので、なにか進捗があったらまた記事にする予定です。
旅を楽しくするArduino端末を作る。リンク集
その1-不満点を挙げよう-
その2-不満点をまとめよう-
その3-電圧測定器を作る-
その4-温湿度計を作る-
その5-気圧計を作る-
その6-方位・高度計をGPSで-
その7-12Vバッテリーから電力供給
その8-Ver1作成-
その9-電圧計の誤差とその代替案-
その10-Ver2へアップデート-
その11-LCDをI2Cで制御しよう-
その12-LCDをI2C化-
その13-Ver3へアップデート-
その14-USB充電の仕様に関して-
その15-Arduino言語を用いながらBluetoothで通信できるESP32-
その16-旅Arduino Ver4 スマホアプリ化-


この記事へのコメントはありません。